-
How to set up an OpenVPN client connection on the pcWRT router
Setting up a VPN connection on the router is not an easy task. First of all, not many routers support VPN. If your existing router does not support VPN out of the box, you might need to flash it with open source firmware so that you can install VPN software on it. Then you need to create a VPN connection, which is not a very user-friendly process either.
After you made a successful connection, you need to check for things like DNS leak, and kill switch. If not done right, both will leak your personal info while you assume you are securely connected through a VPN.
What if you want to connect through VPN sometimes, but directly through your ISP other times? Or you want to have some devices connect through VPN, while leaving other devices on the ISP? A popular solution is the dual-router setup. As you can see, that is also fairly complicated.
With pcWRT release 1.28.1, we’ve made it really easy to set up a VPN connection. In the instructions below, I’ll use NordVPN as an example. The processes for other VPN service providers are more or less the same.
Before you start, you need to download the OpenVPN
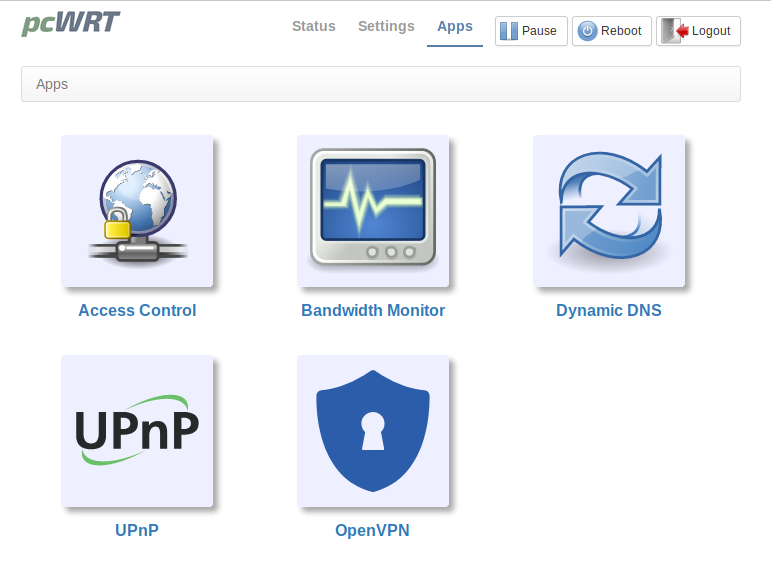
.ovpnfile from your VPN service. For NordVPN, click the “Servers” link on the top of their home page, select the location of the server you want to connect to, then click “Download config” for “OpenVPN UDP” or “OpenVPN TCP”.- Log on the pcWRT router management console, click “Apps” link on the top. Then click the OpenVPN icon.
- Click the “Add” button to add a new connection.
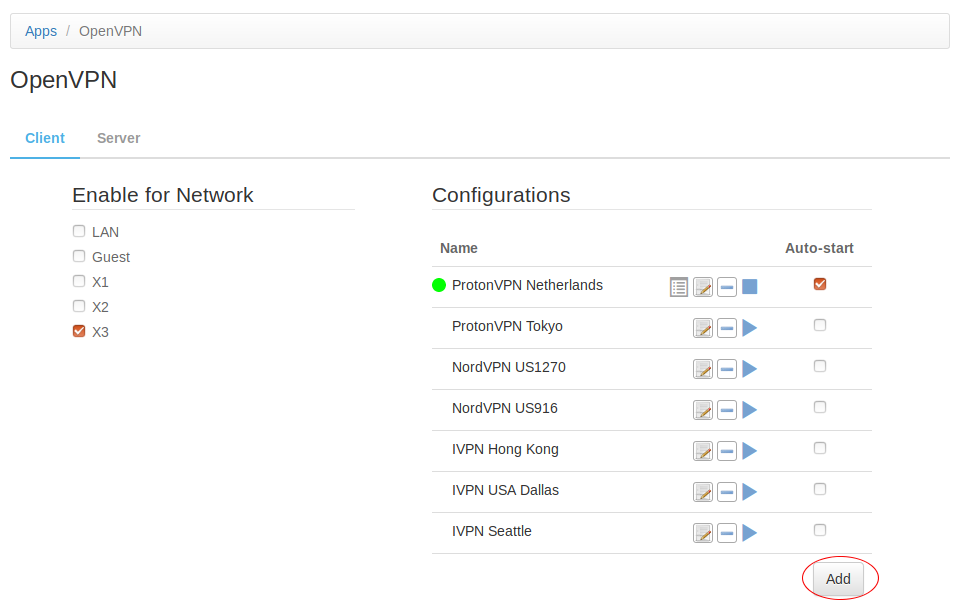
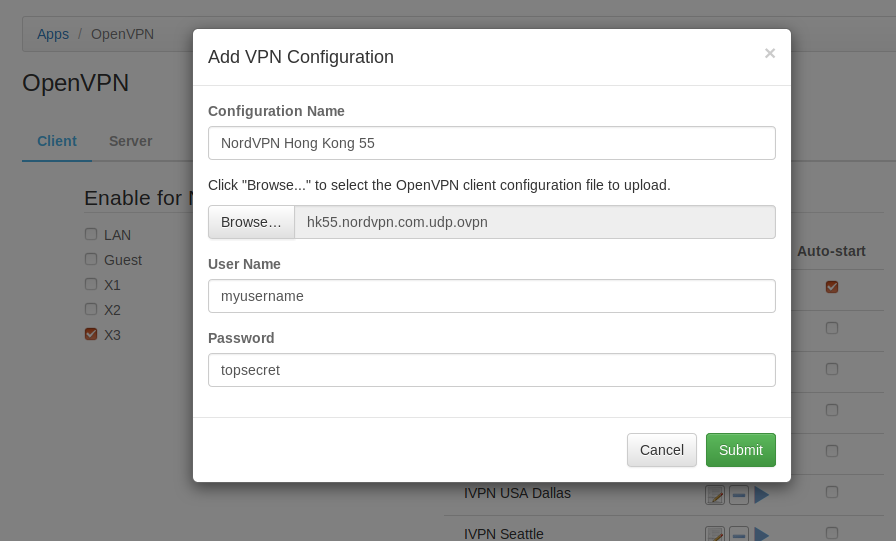
- Enter a name for the new connection, select the .ovpn file to upload, and enter user name and password.
- On the left of the page, check the network(s) you want to use this VPN connection for. You may check one or multiple, or all. But whatever your selections are, those are the local networks that will use the VPN connection. The unselected networks will use your normal ISP connection. The pcWRT router allows you to create up to five local networks and up to four wireless networks.
Click the Save button at the bottom of the page.
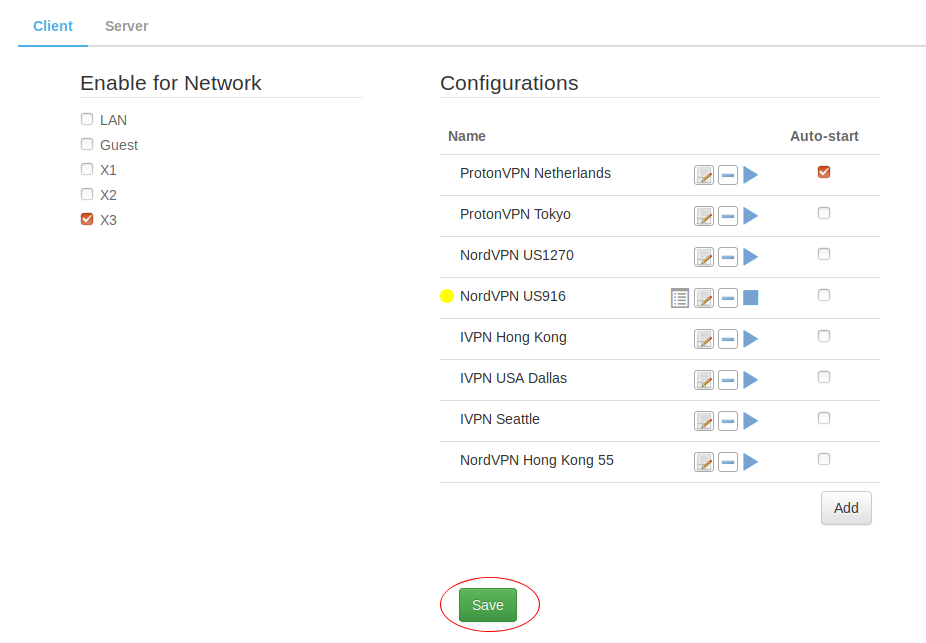
- Click the “Play” icon on the newly added connection to start the VPN connection. After a successful connection is established, a green dot will appear to the left of the named connection.

Check the “Auto-start” checkbox if you want the VPN connection to automatically start then the router boots up.
Since the pcWRT router has the ability to create multiple networks and lets you specify which network(s) should be routed through the VPN, it’s very easy to have some devices connect through the VPN while leaving others on the ISP network: just connect them to different networks. And in case you want to switch a device to a VPN connection or away from it, just connect to a different SSID.
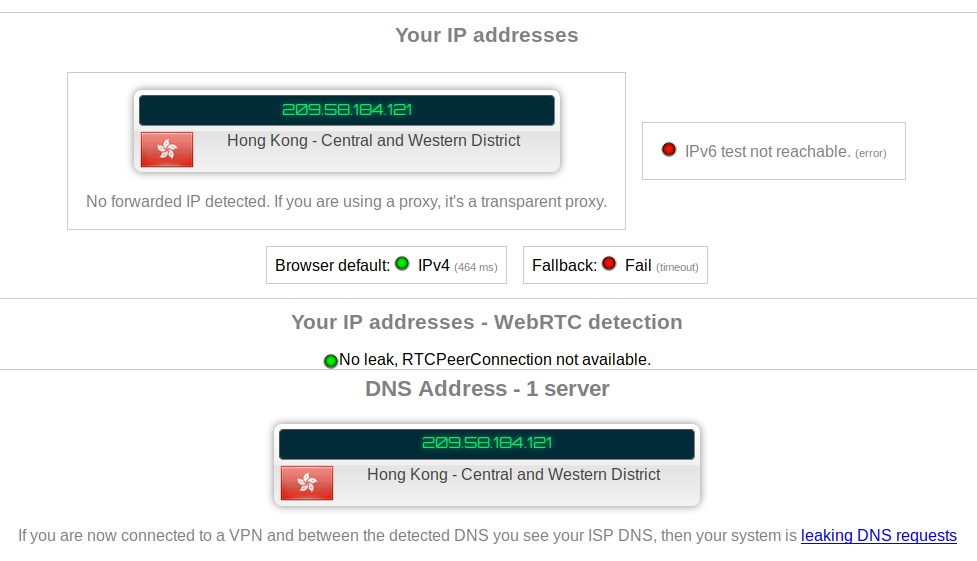
To check that the VPN connection is actually working, connect a device to one of the networks routed through VPN and load ipleak.net.
- Log on the pcWRT router management console, click “Apps” link on the top. Then click the OpenVPN icon.


Recent Posts
- Observing Android VPN Leaks with the pcWRT Router
- How to set up a second pcWRT router as an Access Point with VLAN support
- Is the MELLO charger a scam (Kickstarter)?
- How to reset the pcWRT router
- How to create your SSH key and use it on the router
Recent Comments
- on How to reset router password by email
- on How to reset router password by email
- on Does your parental control pass the DOH test?
- on How to create your SSH key and use it on the router
- on How to create your SSH key and use it on the router
Archives
- January 2025
- December 2024
- June 2024
- April 2024
- March 2024
- August 2023
- May 2023
- February 2023
- June 2022
- December 2021
- November 2021
- August 2021
- January 2021
- December 2020
- October 2020
- August 2020
- July 2020
- June 2020
- May 2020
- April 2020
- February 2020
- January 2020
- December 2019
- October 2019
- December 2018
- August 2018
- July 2018
- June 2018
- January 2018
- November 2017
- October 2017
- September 2017
- August 2017
- July 2017
- June 2017
- January 2017
- August 2016
- May 2016
- December 2015
- August 2015
- July 2015
- May 2015
- April 2015
- March 2015
Categories


