-
How to set up a WireGuard VPN server on the pcWRT router
Prerequisites
- Check if your router is behind NAT. If behind NAT, put the router in DMZ or configure port forwarding.
- Set up Dynamic DNS.
Set up server
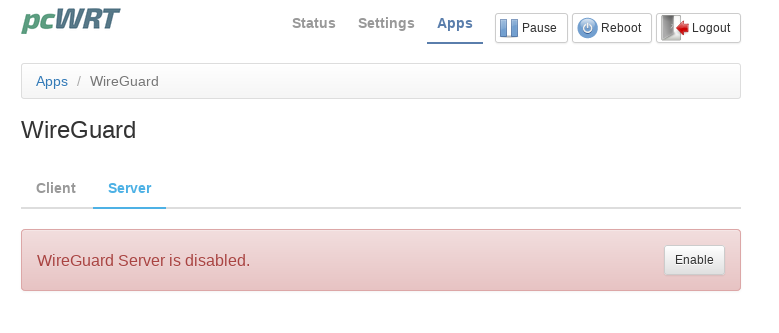
- Log in the pcWRT console. Click Apps then click WireGuard®*.
- Click on the Server tab. WireGuard server is disabled by default. Click the “Enable” button.
- If you enabled native Dynamic DNS, the “External Address” field will be filled with the DDNS name. Otherwise, it will be filled with the external IP address as seen by the router. If you have a third party DDNS service, you can put the DDNS name in the “External Address” field.
The Port, IP Address & Netmask fields will be filled with default values too. The defaults should be fine, but you may make changes if you want.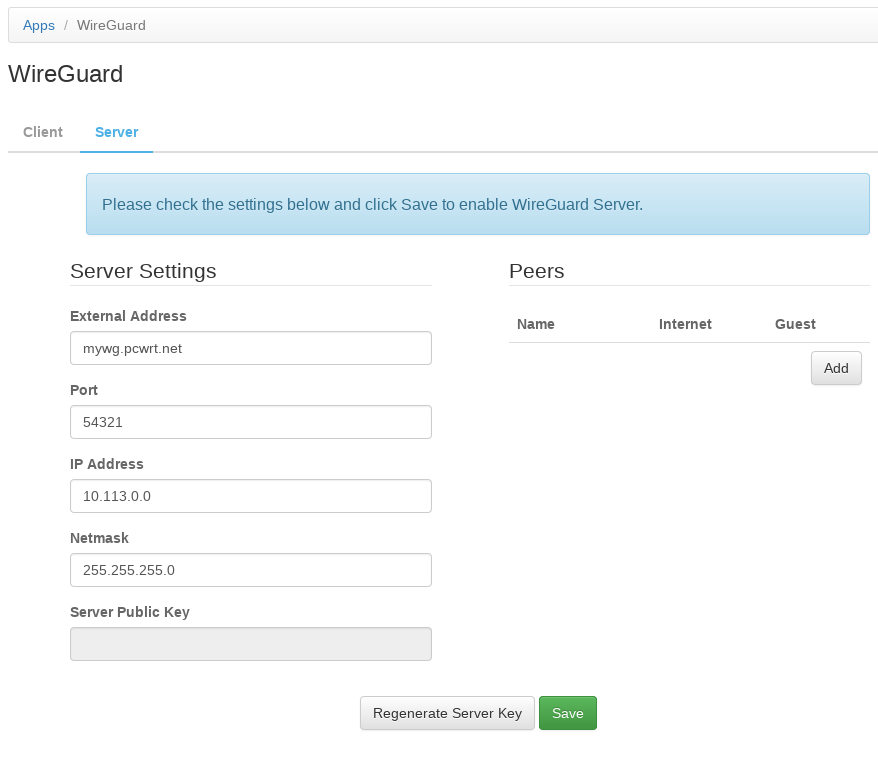
- Click the Add button in the Peers section to add a WireGuard client configuration.
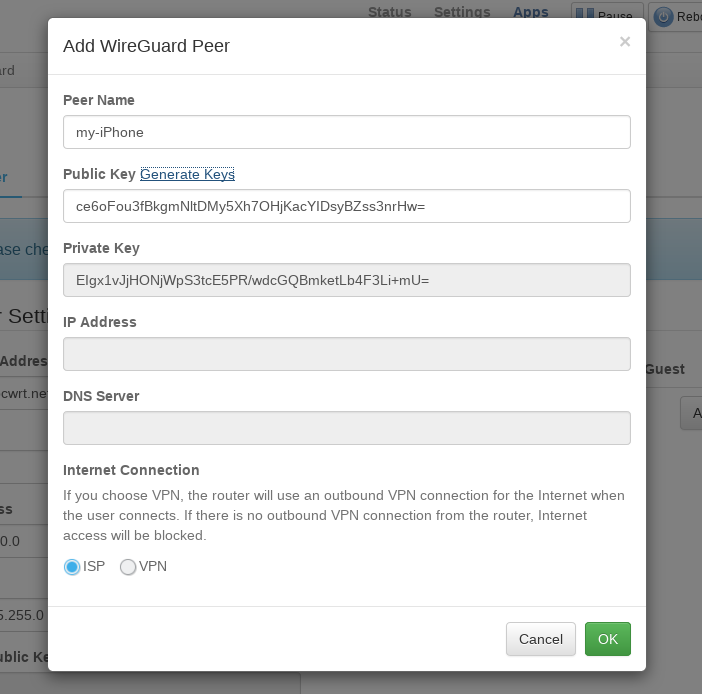
- In the popup dialog, enter a name for the client configuration. Click the Generate Keys link to generate a pair of keys for the client. Then click OK to dismiss the dialog.
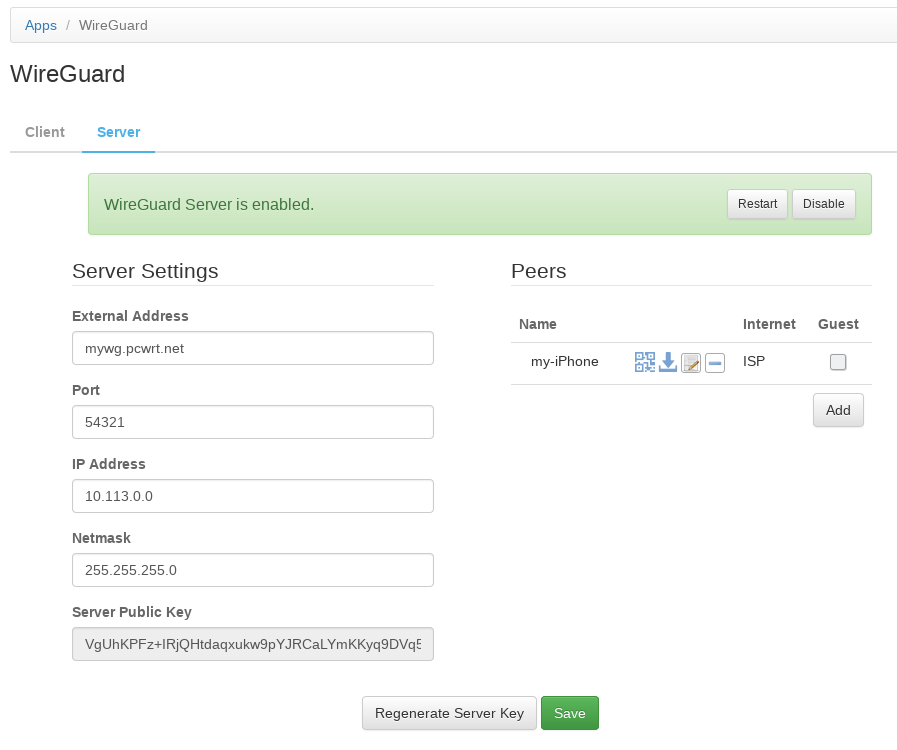
- Click Save to save the server and client configurations. The Server Public Key field will be populated and WireGuard server will be started.
Configure a client
Using Android phone as example here.
- Install the WireGuard app from Google Play Store.
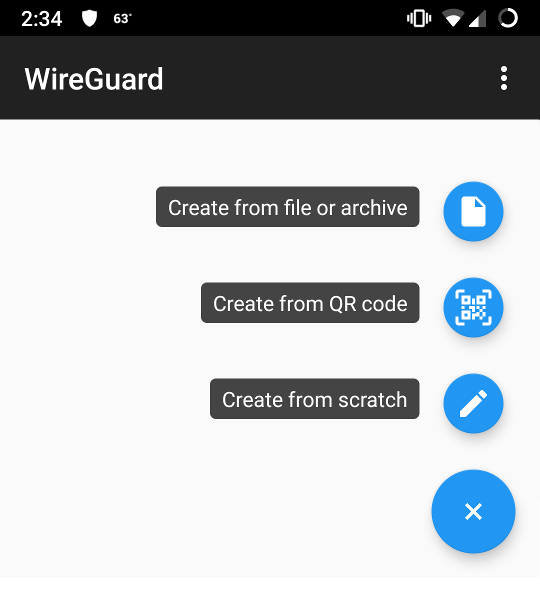
- Open the WireGuard app. Tap the + button at the bottom right corner. Tap Create from QR code.
- Go back to the pcWRT console WireGuard page. Click on the QR code icon to bring up the QR code dialog.
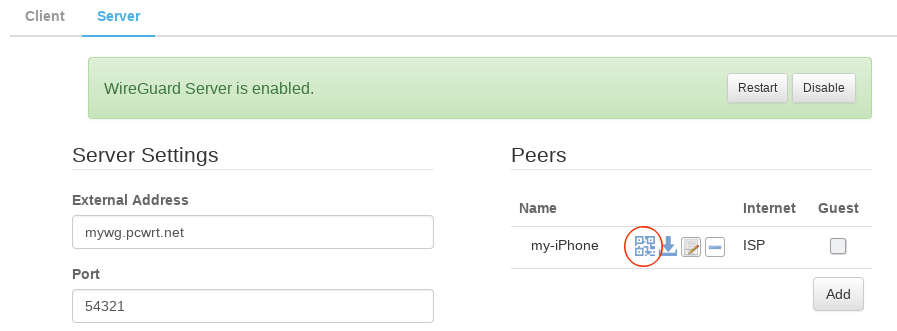
- Scan the QR code to set up the WireGuard client connection.
Caution: the client QR code contains both public and private keys for the client. Anyone with the QR code can connect to your WireGuard server. It is strongly advised that you don’t share the QR code by means where it could be lost or stolen (e.g., email etc.).
* “WireGuard” is a registered trademark of Jason A. Donenfeld.


Recent Posts
- Observing Android VPN Leaks with the pcWRT Router
- How to set up a second pcWRT router as an Access Point with VLAN support
- Is the MELLO charger a scam (Kickstarter)?
- How to reset the pcWRT router
- How to create your SSH key and use it on the router
Recent Comments
- on How to reset router password by email
- on How to reset router password by email
- on Does your parental control pass the DOH test?
- on How to create your SSH key and use it on the router
- on How to create your SSH key and use it on the router
Archives
- January 2025
- December 2024
- June 2024
- April 2024
- March 2024
- August 2023
- May 2023
- February 2023
- June 2022
- December 2021
- November 2021
- August 2021
- January 2021
- December 2020
- October 2020
- August 2020
- July 2020
- June 2020
- May 2020
- April 2020
- February 2020
- January 2020
- December 2019
- October 2019
- December 2018
- August 2018
- July 2018
- June 2018
- January 2018
- November 2017
- October 2017
- September 2017
- August 2017
- July 2017
- June 2017
- January 2017
- August 2016
- May 2016
- December 2015
- August 2015
- July 2015
- May 2015
- April 2015
- March 2015
Categories


