-
How to setup Windscribe VPN on the pcWRT router (WireGuard)
Download Windscribe VPN WireGuard configuration files
- Log in to your Windscribe account.
- Click the Download button.
- Scroll down to the bottom of the page and click WireGuard in the “Config Generators” section.
- Choose a server location and port, then click Download Config.
Create a Windscribe VPN WireGuard connection
- Log in the pcWRT management console, click on the WireGuard VPN icon under Apps.
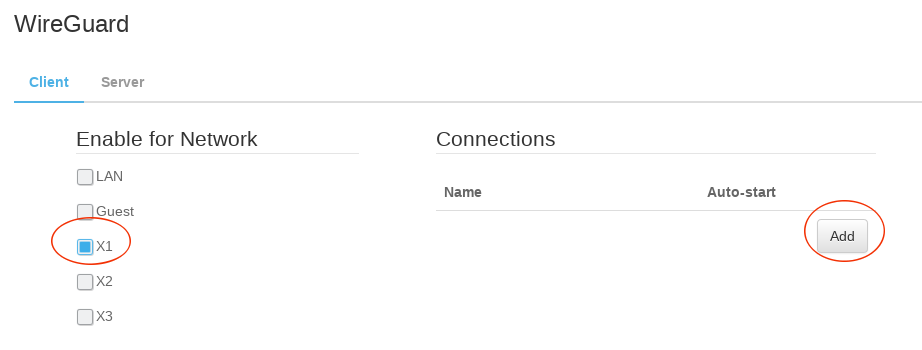
- Under the Client tab, check the network you want to enable Windscribe VPN for, then click the Add button under the “Connections” section.

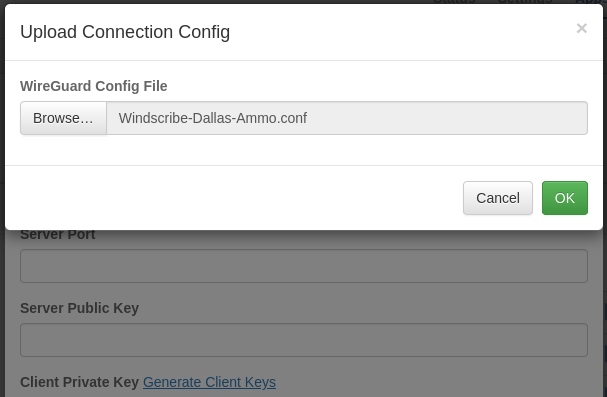
- In the popup dialog, click on Upload Wireguard Config

- Select the WireGuard configuration file you downloaded from Windscribe above, click OK.

- Enter a name for the Windscribe VPN connection, then click OK to dismiss the dialog.
- Click Save to save the Windscribe VPN WireGuard connection.
Start a Windscribe VPN WireGuard connection
- Click on the blue “Play” button to start the Windscribe VPN WireGuard connection.

- If the connection is successful, a green dot will appear on the left of the connection configuration line. In case of a connection failure, click on the “log” icon to view WireGuard logs. Click on the Edit button to double check server hostname, client and server keys, client IP address etc.

* WireGuard® is a registered trademark of Jason A. Donenfeld.


