-
How to set Internet time limit on NETGEAR router
If you use NETGEAR Genie, there’s a Parental Controls button in the home page. Clicking that button will lead you to https://netgear.opendns.com, if you already created an account with OpenDNS. NETGEAR Genie will ask you to create an OpenDNS account if you haven’t done so.
After you land on the OpenDNS page, it will let you set your Internet filtering options. You can even set up different filtering levels for different time ranges. But you can’t completely shutdown the Internet, say after 11:00pm. A workaround would be to use custom filtering for the time range you want to shutdown the Internet. In your custom settings, block all available categories. Although very close, this still doesn’t completely shutdown the Internet, since there are websites not categorized by OpenDNS.
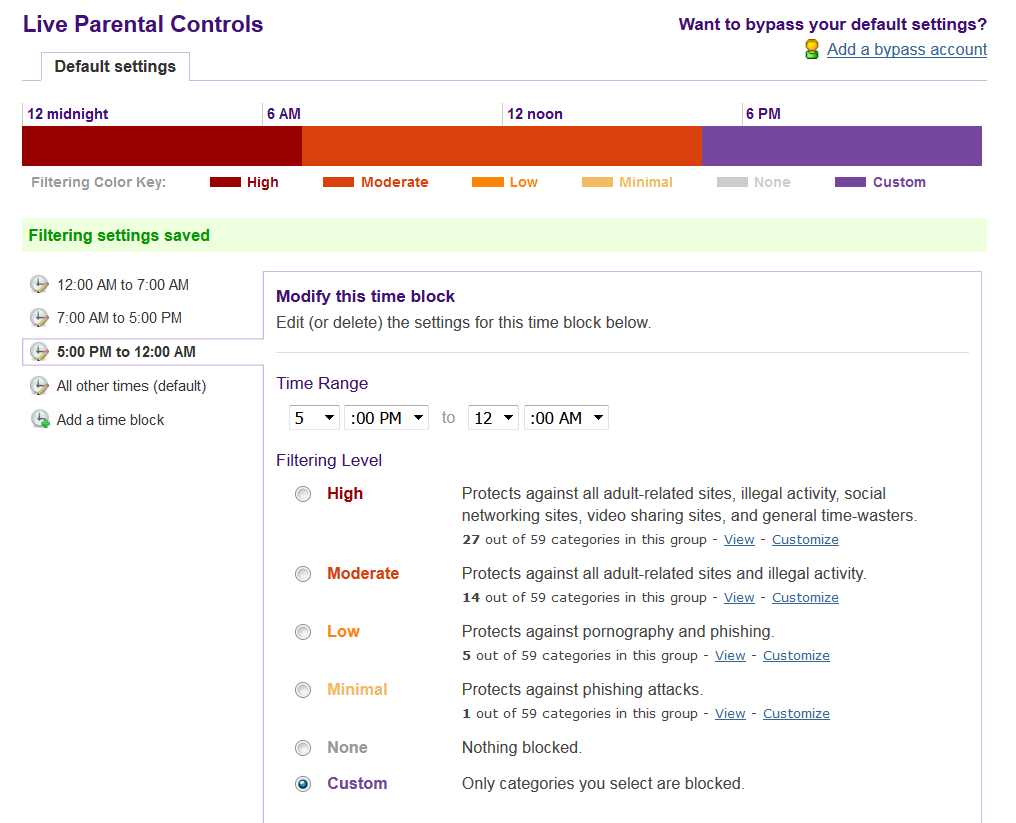
Notice that, once set up, this schedule affects everyone not using a bypass account.
You can also access the router UI directly, without using NETGEAR Genie, by entering “routerlogin.net” in your browser address bar. Here you have additional options for blocking Internet access. The following procedure might be used to set up time limits for the Internet, by using the Block Services function in an unintended way.
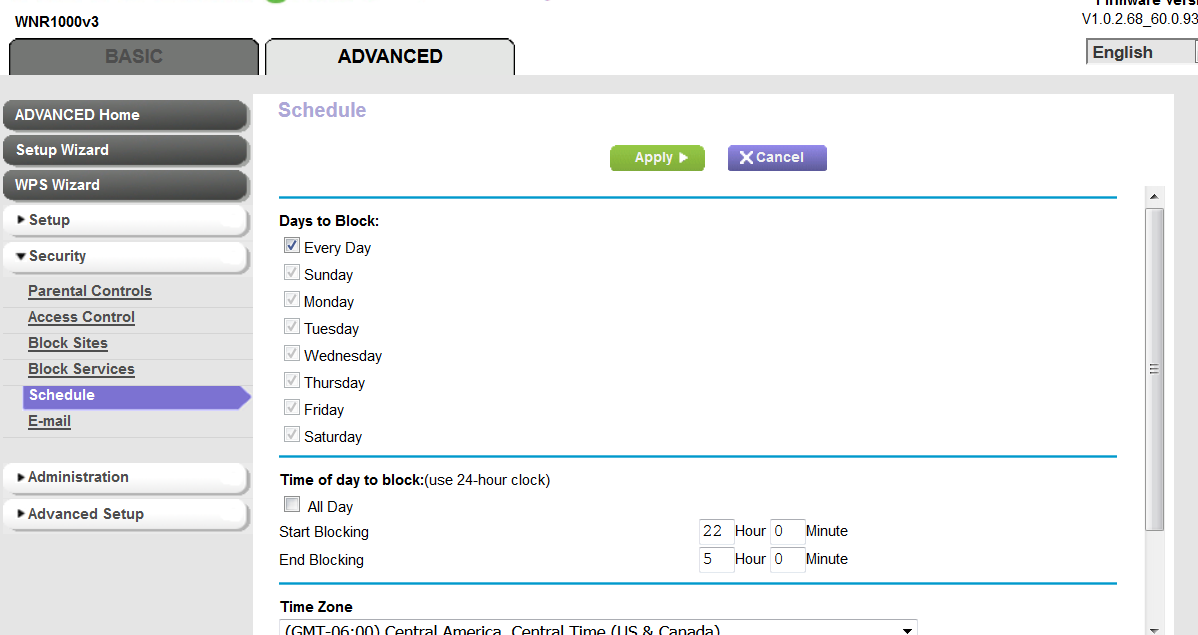
First, you need to set up a schedule. NETGEAR allows you to set up one time block and apply this time block to everyday or the days in a week you choose. In the example below, the start time is 22:00 and the end time is 5:00, because I want to turn off the Internet from 10:00pm the current day till 5:00am the next day.
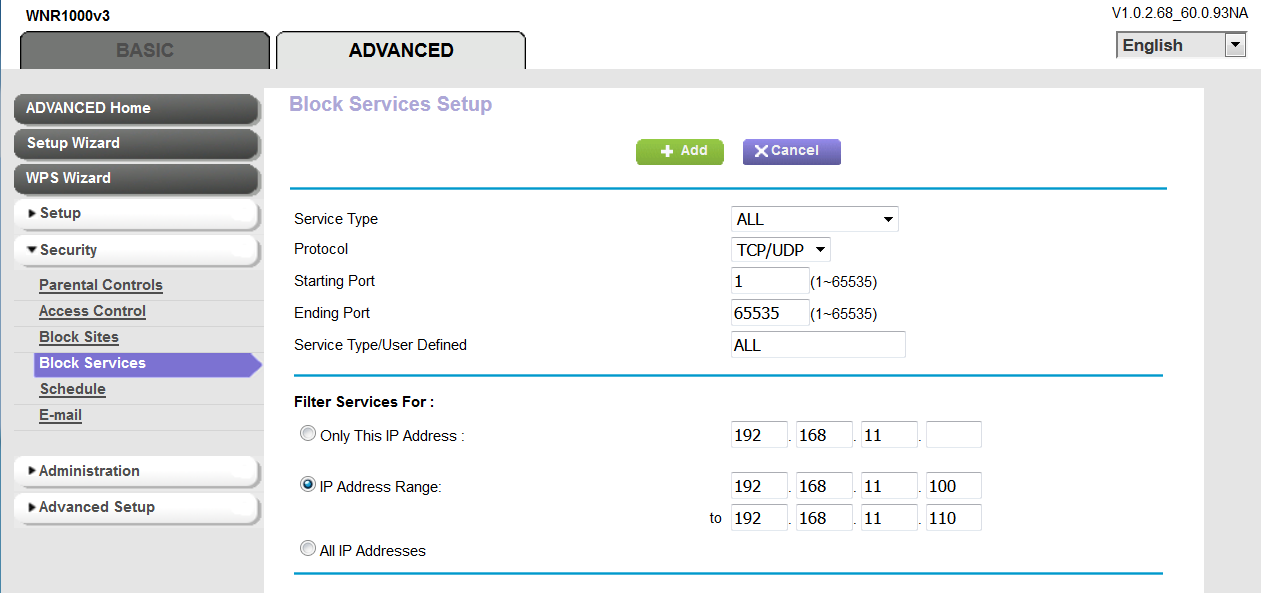
Then you need to Block Services for the IP address range for the computers you want the blocking schedule to apply.
Select ALL in Service Type, TCP/UCP in Protocol, enter the IP Address Range, then click Add.
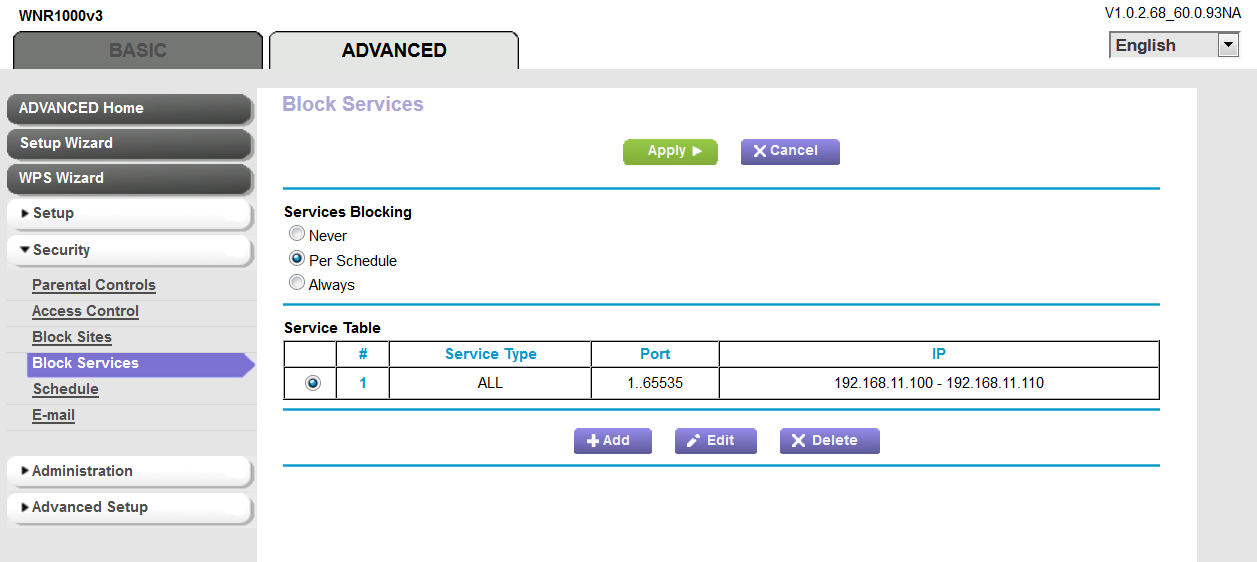
In Services Blocking, select Per Schedule, then click Apply.
Finally, you need to assign IP addresses to the computers you want to block within the IP address range you entered above.
- Click Setup, LAN Setup, then in the screen below, click Add
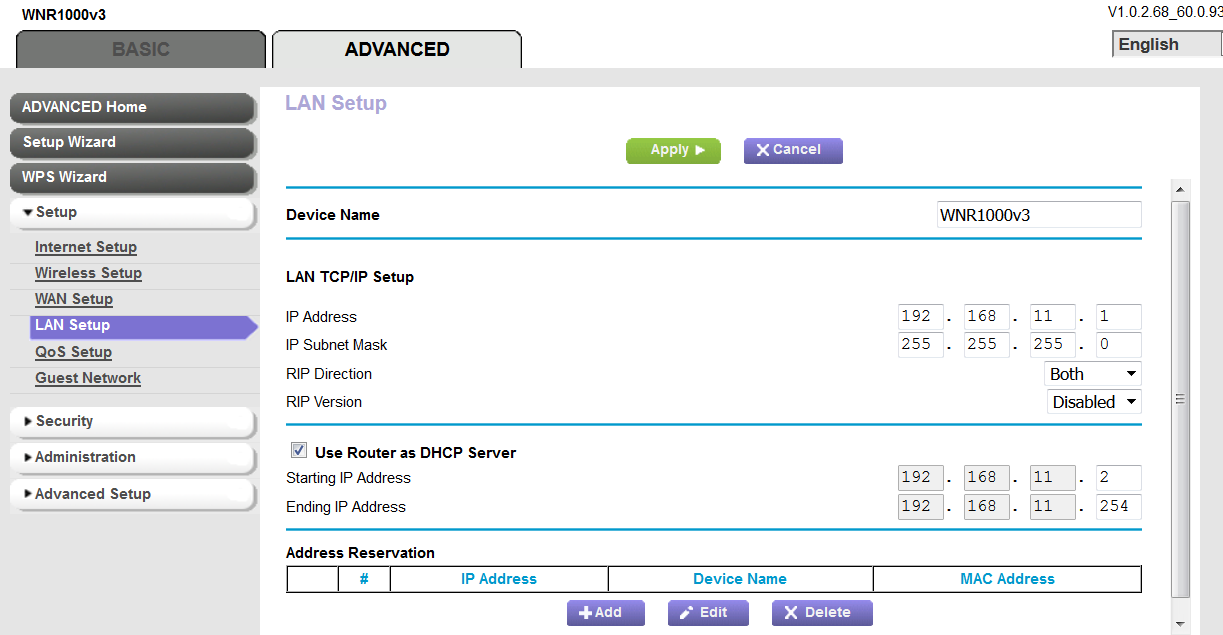
- Enter the IP Address, MAC Address and Device Name. Make sure the IP address is within the range you entered in Block Services. Click Add.
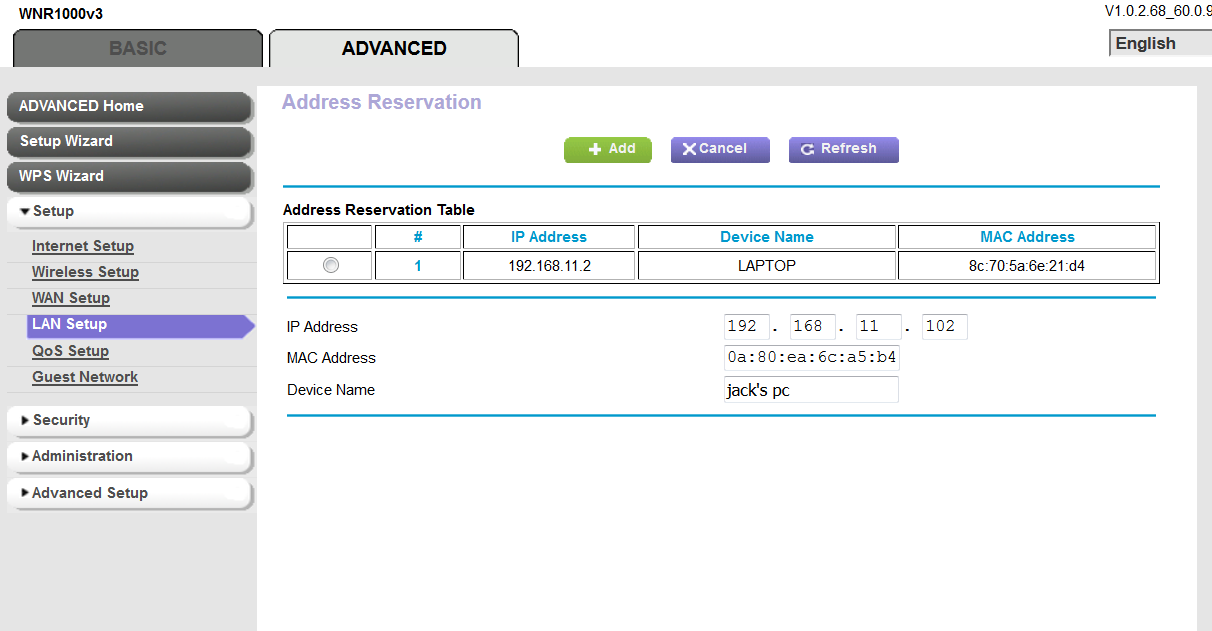
- Click Apply.
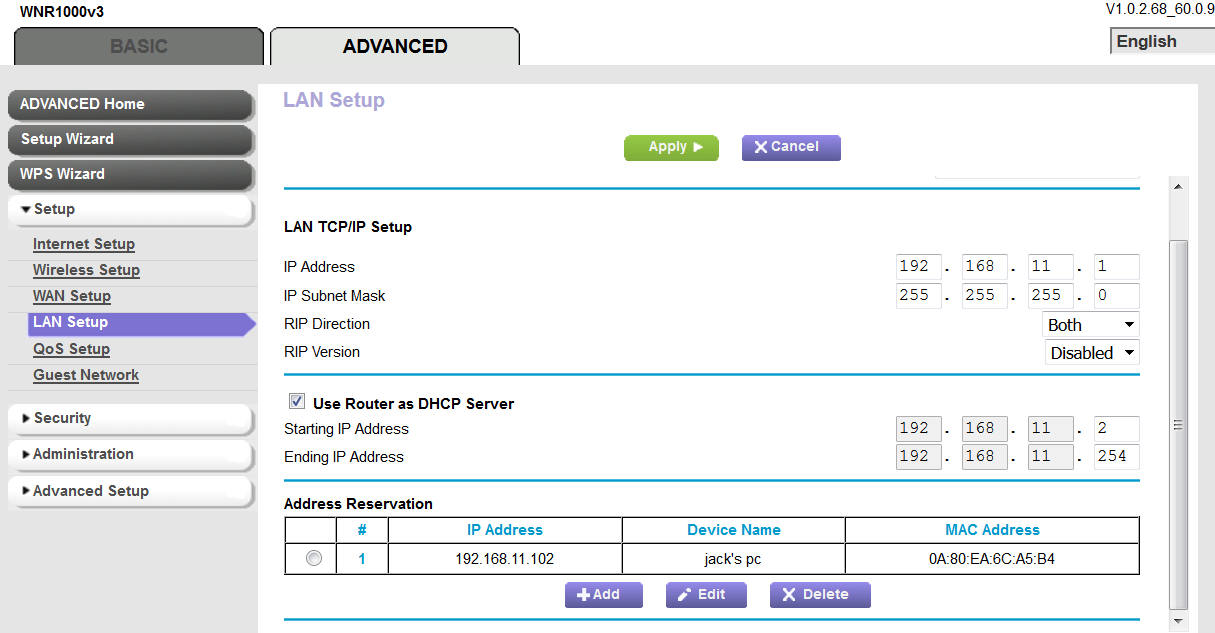
Also note that there’s only one schedule, and it applies to all devices for which the IP address falls within the IP address range set up in Block Services.
- Click Setup, LAN Setup, then in the screen below, click Add


Recent Posts
- Is the MELLO charger a scam (Kickstarter)?
- How to reset the pcWRT router
- How to create your SSH key and use it on the router
- How to reset router password by email
- How to set up SurfShark WireGuard VPN on the pcWRT router
Recent Comments
- on Does your parental control pass the DOH test?
- on How to create your SSH key and use it on the router
- on How to create your SSH key and use it on the router
- on How to setup TunnelBear OpenVPN on the pcWRT router
- on How to setup TunnelBear OpenVPN on the pcWRT router
Archives
- June 2024
- April 2024
- March 2024
- August 2023
- May 2023
- February 2023
- June 2022
- December 2021
- November 2021
- August 2021
- January 2021
- December 2020
- October 2020
- August 2020
- July 2020
- June 2020
- May 2020
- April 2020
- February 2020
- January 2020
- December 2019
- October 2019
- December 2018
- August 2018
- July 2018
- June 2018
- January 2018
- November 2017
- October 2017
- September 2017
- August 2017
- July 2017
- June 2017
- January 2017
- August 2016
- May 2016
- December 2015
- August 2015
- July 2015
- May 2015
- April 2015
- March 2015
Categories


As you can see, there’s a lot of hacking to set up a simple schedule with NETGEAR. By comparison, the pcWRT router provides much more powerful scheduling functions in a much simpler way: http://www.pcwrt.com/2015/12/how-to-set-internet-access-time-limits-in-pcwrt/