-
How to set up IKEv2 VPN Connection on Windows 10 with Certificate or EAP-MSCHAP v2 Authentication
This guide assumes that you have obtained a Personal Information Exchange (p12) file from your VPN service provider. The file contains the server certificate and maybe the client private key & certificate (if using certificate authentication instead of EAP-MACHAP v2).
There are two major tasks: install the certificates and create a VPN connection.
Task 1: install the certificates.
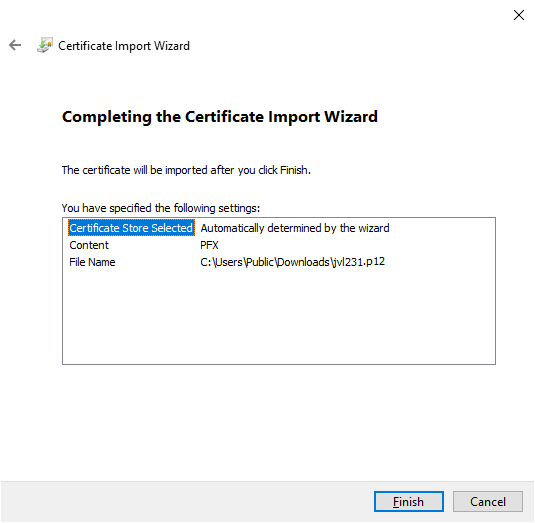
- Double click the p12 file. Select “Local Machine” on the “Certificate Import Wizard” dialog.
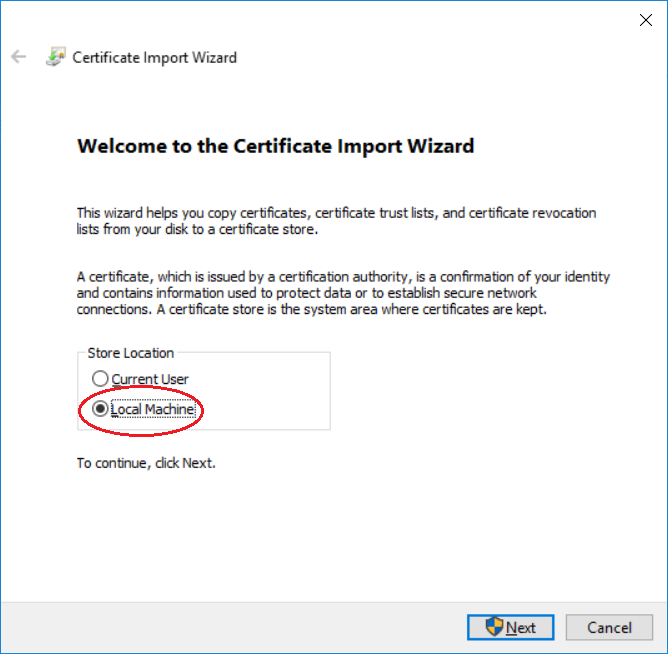
- Click “Next”.
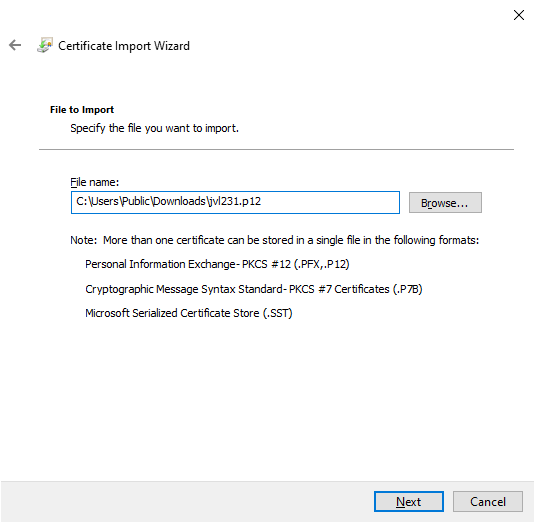
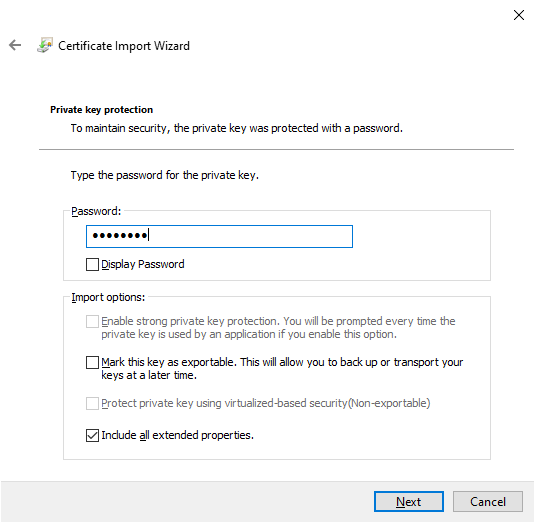
- Enter the password (if there is one).
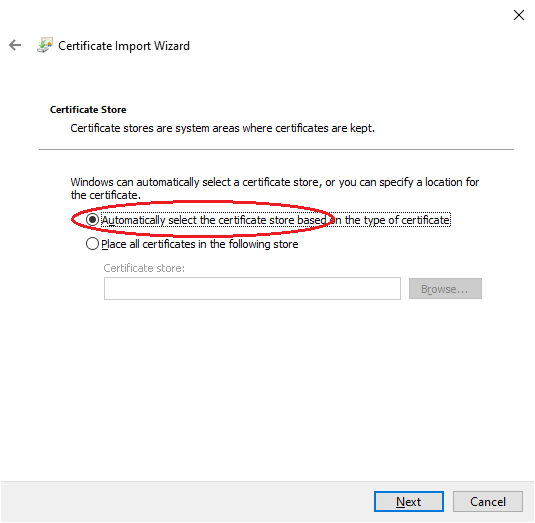
- Select “Automatic…” for the certificate store.
- Click “Finish”.
Task 2: create the VPN connection.
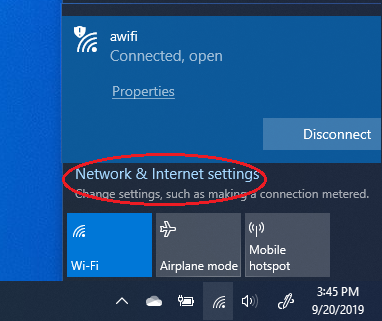
- Click the network icon at the bottom right corner of the screen, then click “Network & Internet Settings”.
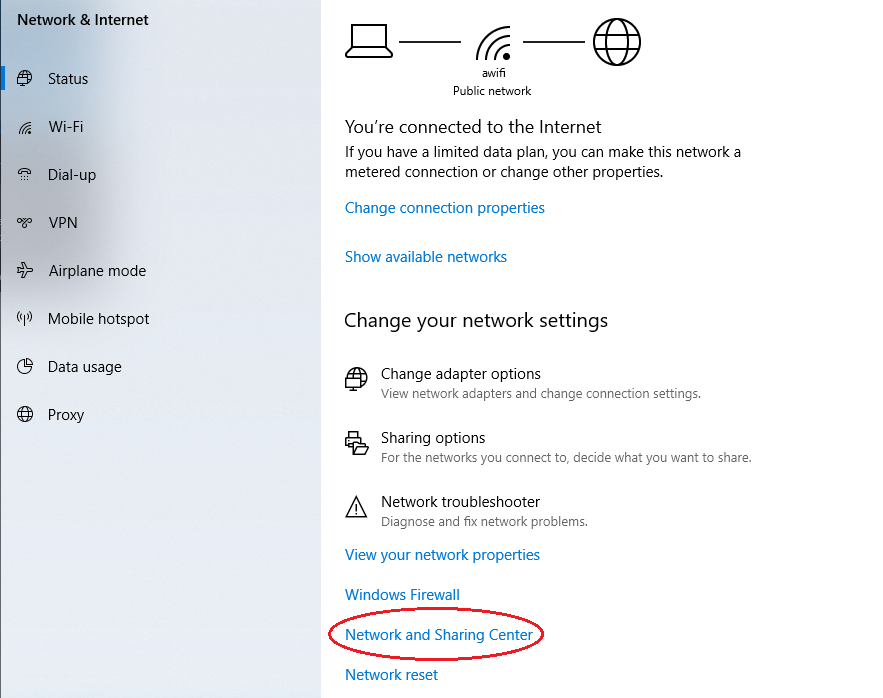
- Click on the “Network and Sharing Center” link (you might need to scroll down a bit).
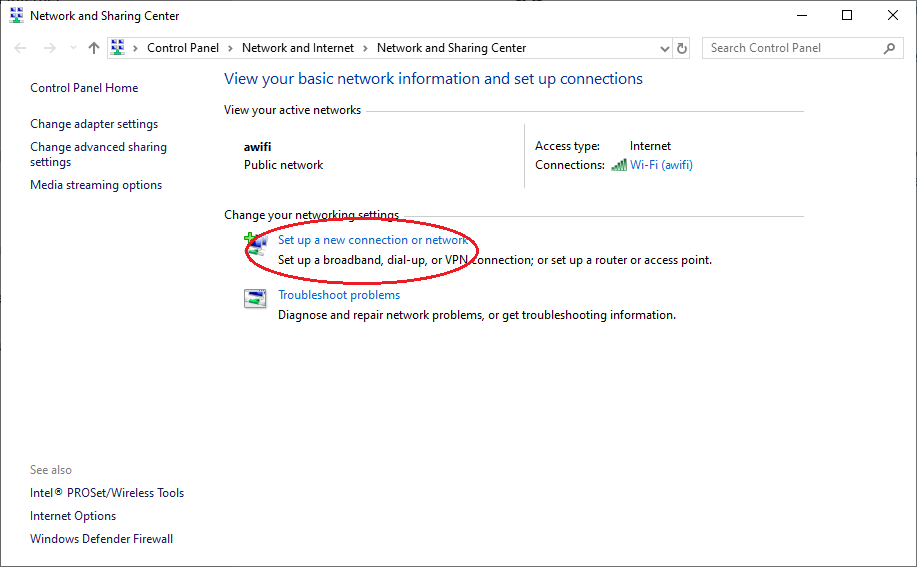
- Click on “Set up a new connection or network”.
- Select “Connect to a workplace”.
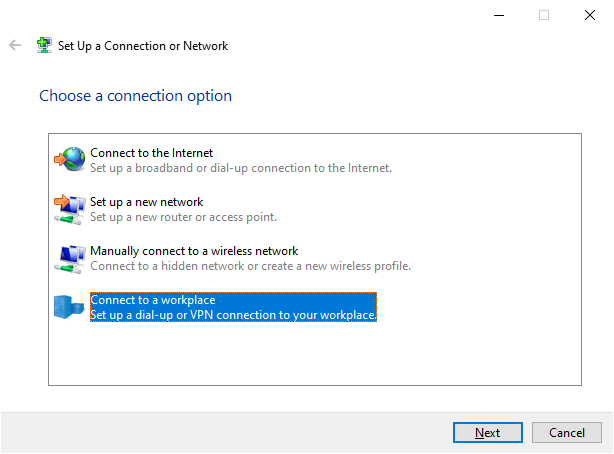
- Click on “Use my Internet connection (VPN)”.
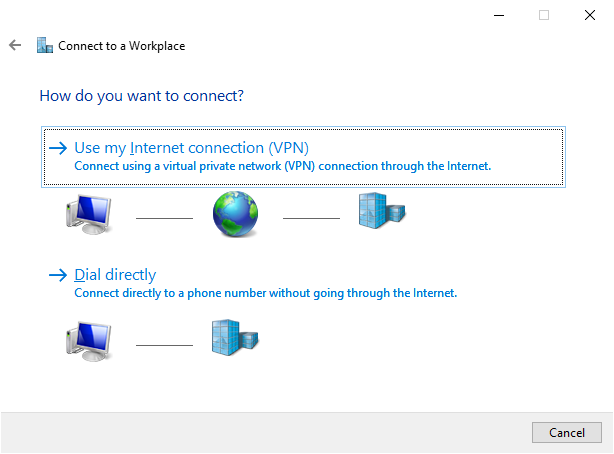
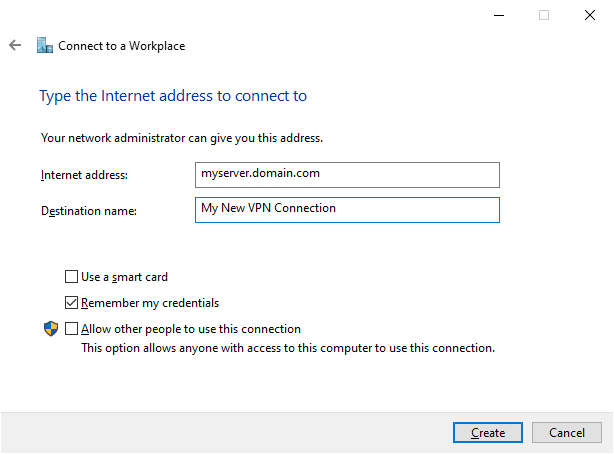
- Enter the VPN server domain name or IP address, give a name to the VPN connection. Then click “Create”.
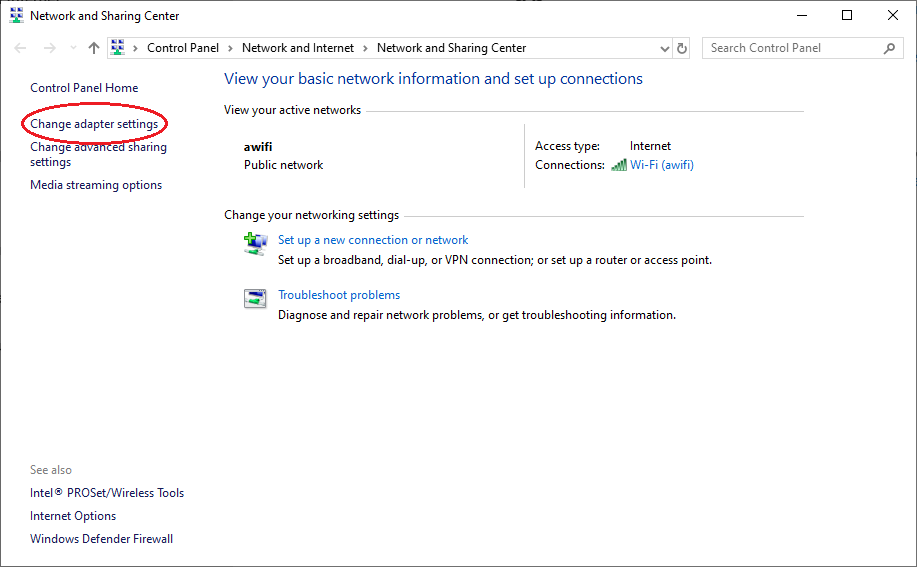
- Go back to the “Network and Sharing Center” dialog and click “Change adapter settings”.
- Right click on the newly created VPN connection, select “Properties”.
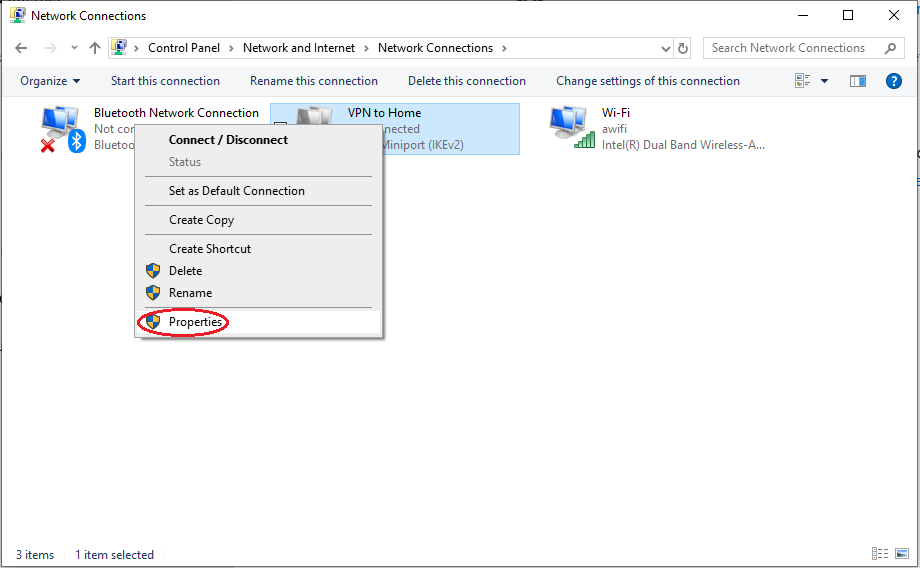
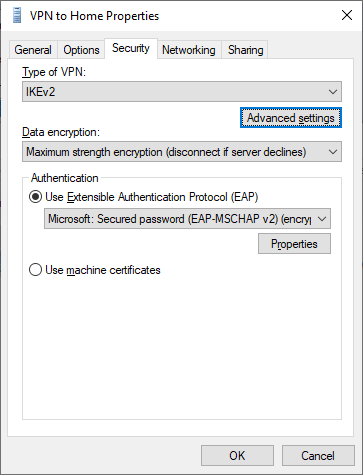
- Click on the “Security” tab, select “IKEv2” for “Type of VPN”. Select “Maximum strength encryption”, and “Use machine certificate” for Authentication (if you are authenticating with EAP-MSCHAP v2 user name and password, see alternative task below).
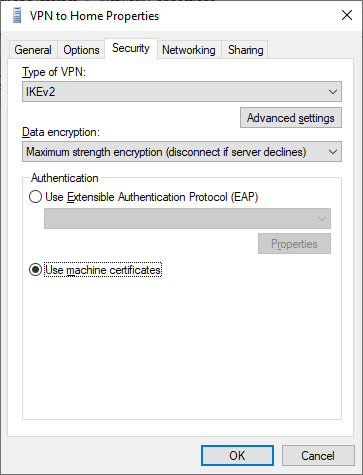
- Click on the “Networking” tab. Uncheck TCP/IPv6.
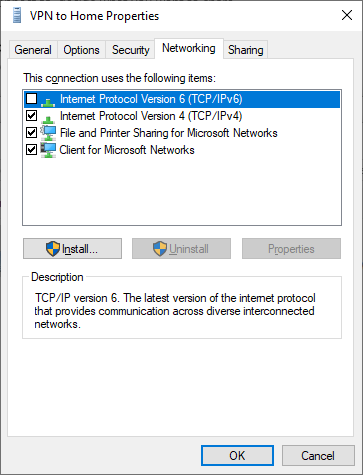
- Click the network icon at the bottom right corner of the screen, then click on the VPN connection to connect to the VPN.
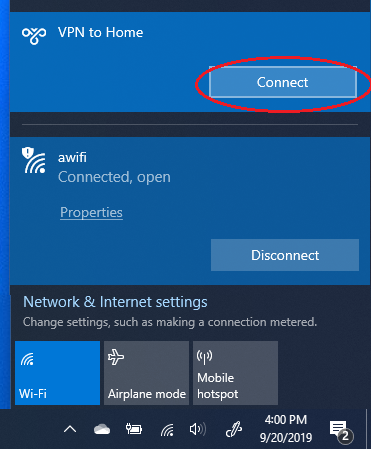
Alternative task 2: if authenticating with EAP-MSCHAP v2.
- In step 9 above, select “Use Extensible Authentication Protocol (EAP), then EAP-MSCHAP v2.
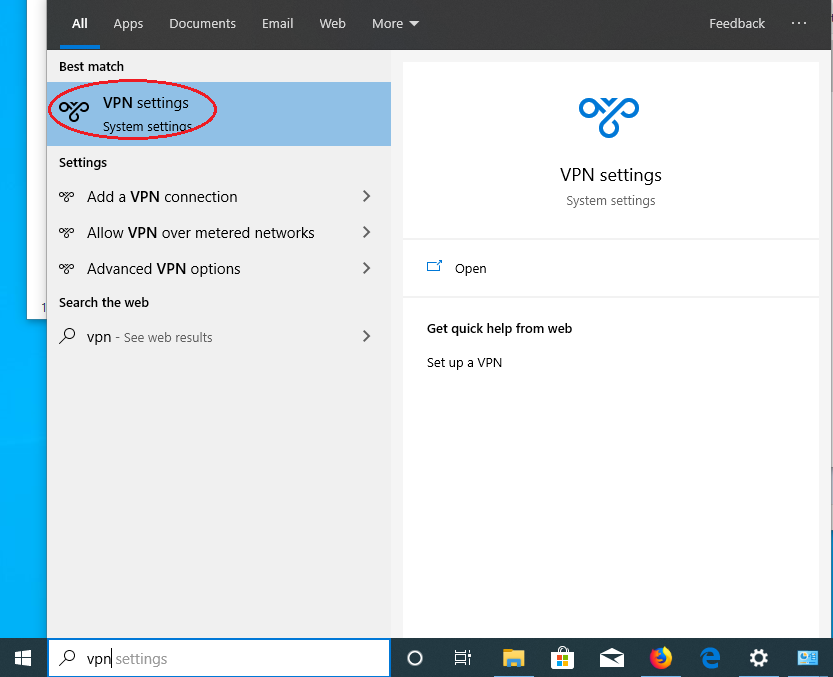
- Click the Windows icon at the left bottom corner of the screen and enter “vpn”. Then click on “VPN settings”.
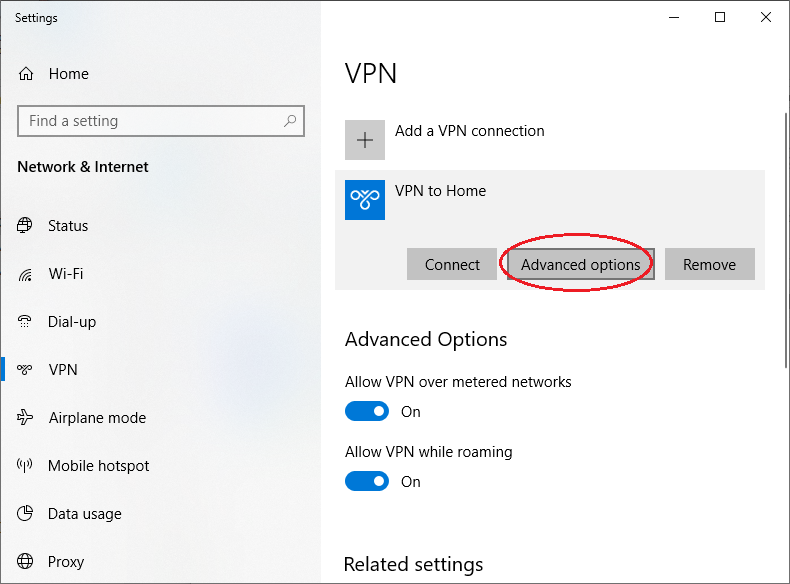
- Click on the VPN connection, then click “Advanced options”.
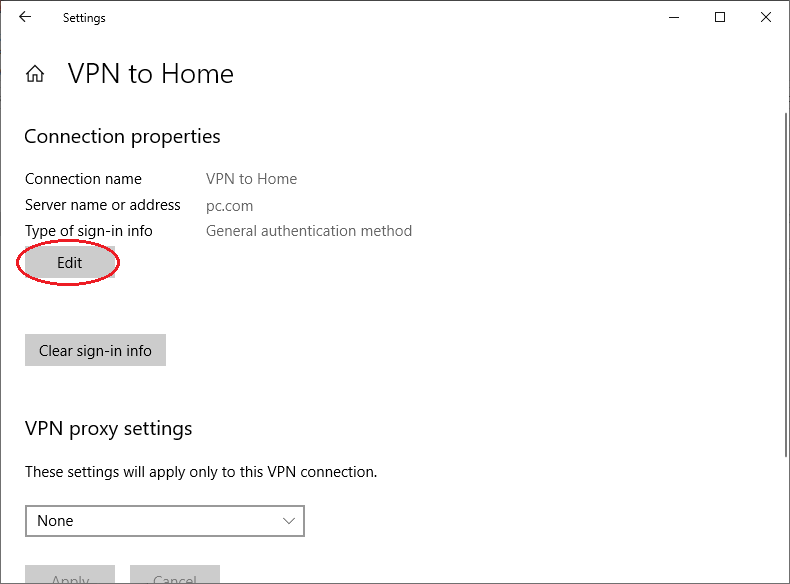
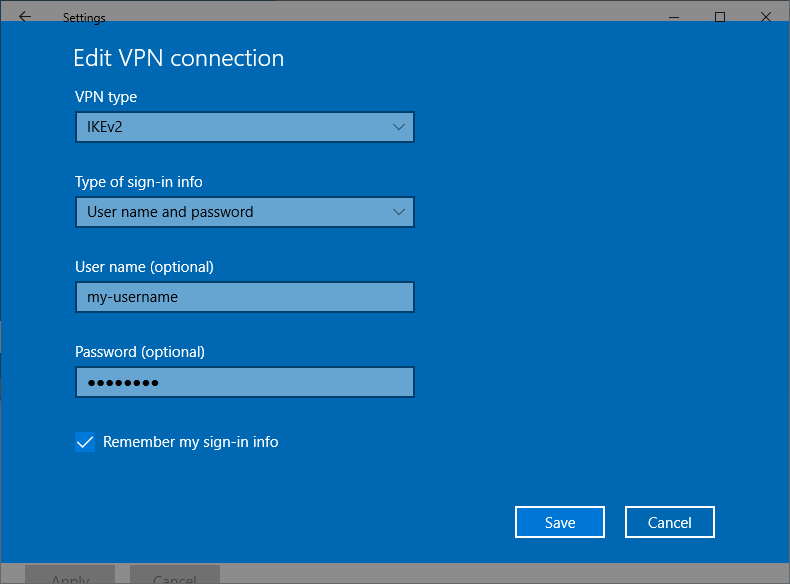
- Click “Edit”.
- Select “User name and Password” for “Type of sign-in info”. Enter user name and password. Click “Save”.
Task 3: Check that your VPN connection is working
- Open a web browser, enter https://ipleak.net/. Make sure that your IP address is that of the VPN service (i.e., no longer your ISP assigned IP address), and DNS addresses are also that from the VPN service.
- If your VPN server is located in the same geographical region as your ISP connection, sometimes it’s hard to tell if your DNS service has changed to that provided by the VPN. This page will tell you who is your DNS provider: http://whoismydns.com/
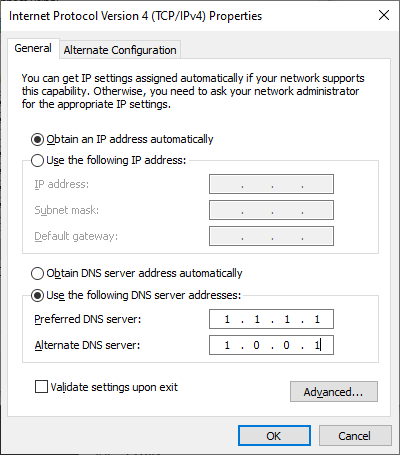
- There are instances that your browser is stuck with the ISP assigned DNS server. In that case, manually set the DNS service on your ISP connection (WiFi or Ethernet adapter) to a third party DNS service, for example, Cloudflare DNS. Just to be safe, disable IPv6 on the WiFi or Ethernet adapter too.
- Double click the p12 file. Select “Local Machine” on the “Certificate Import Wizard” dialog.


