-
How to set up IKEv2 VPN Connection on Windows 7 with Certificate or EAP-MSCHAP v2 Authentication
This guide assumes that you have obtained a Personal Information Exchange (p12) file from your VPN service provider. The file contains the server certificate and maybe the client private key & certificate (if using certificate authentication instead of EAP-MACHAP v2).
There are two major tasks: install the certificates and create a VPN connection.
Task 1: install the certificates.
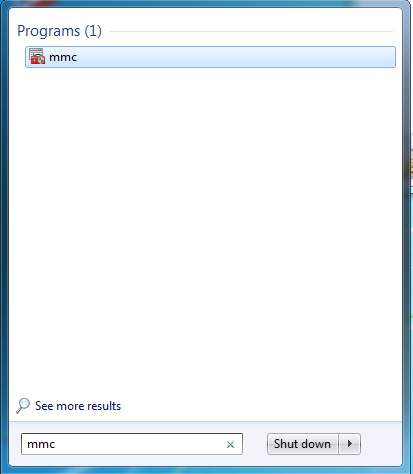
- Start mmc: click the Start button, then enter mmc.
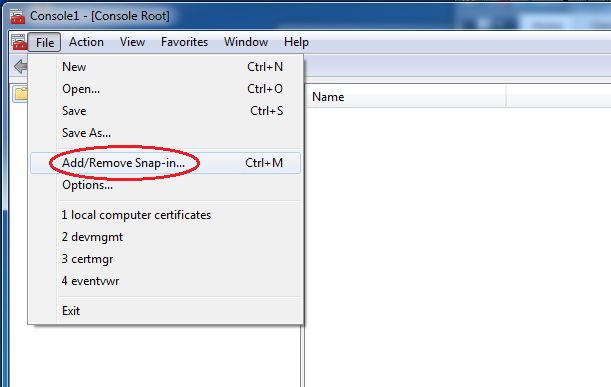
- In the mmc window, click “Add/Remove Snap-in”.
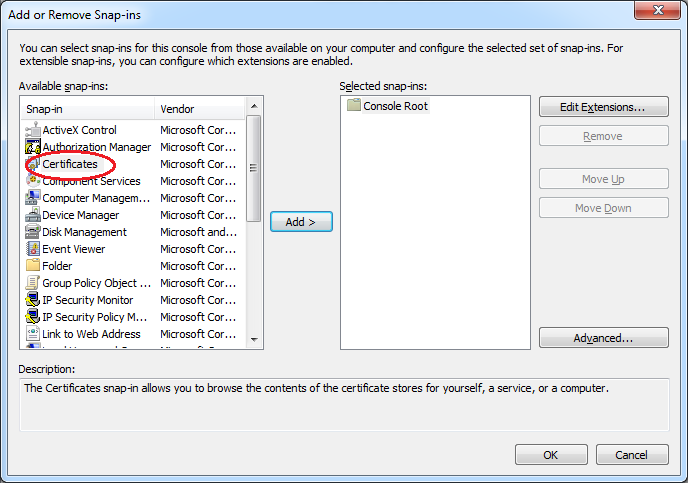
- Select “Certificates”, then click Add.
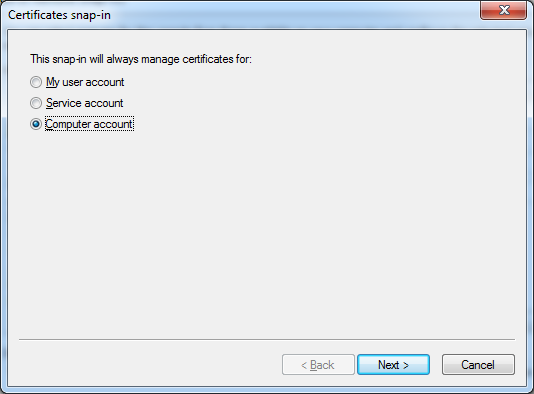
- Select “Computer Account”, click “Next”.
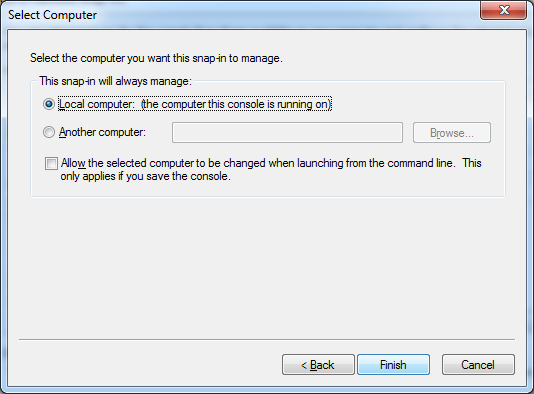
- Select “Local Computer”, click “Finish”.
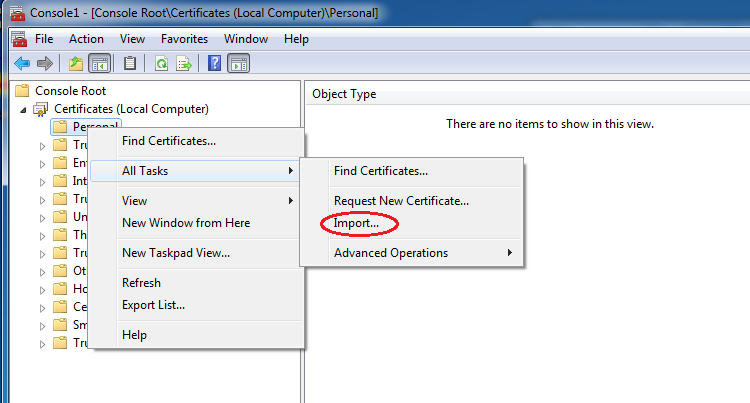
- Right click on “Personal”, select “All Tasks”, then “Import”.
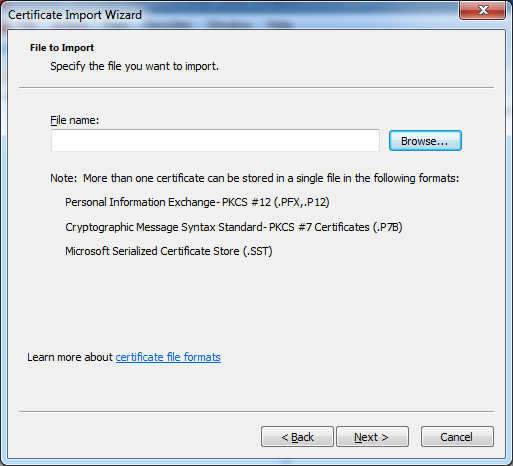
- Browse for the p12 file.
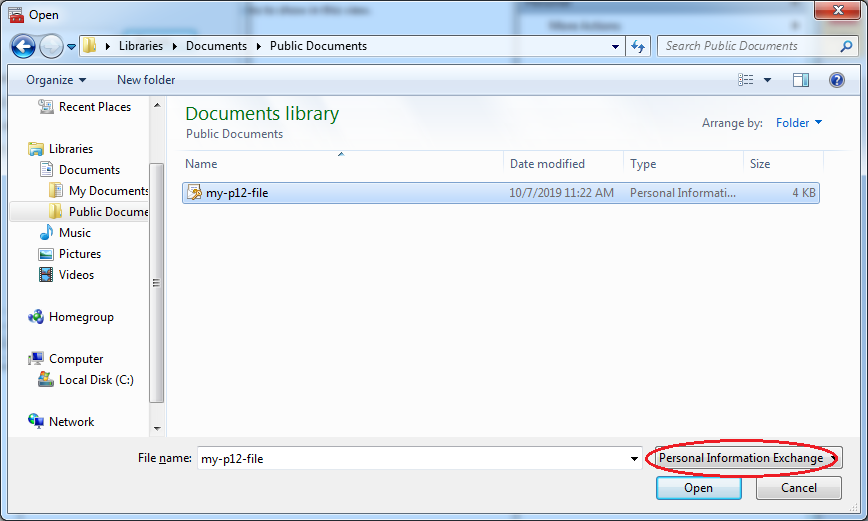
- Select “Personal Information Exchange” under the file type selection dropdown. Then open the p12 file.
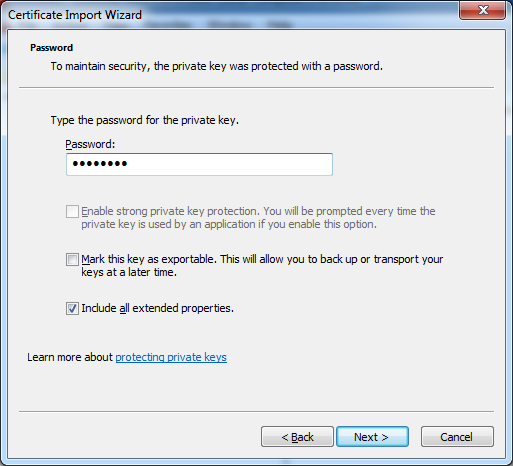
- Enter the password for the p12 file (if there is one).
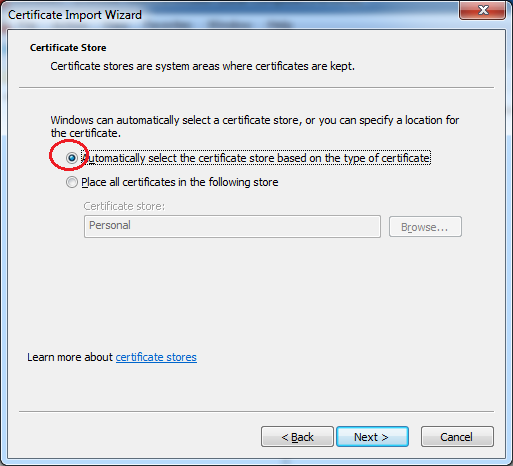
- Select “Automatic” certificate store.
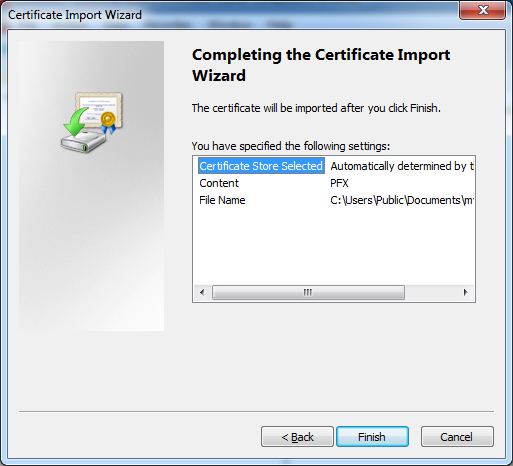
- Click “Finish”.
Task 2: create the VPN connection.
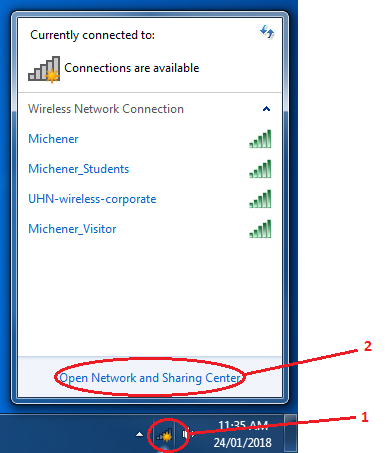
- Click “Open Network and Sharing Center”.
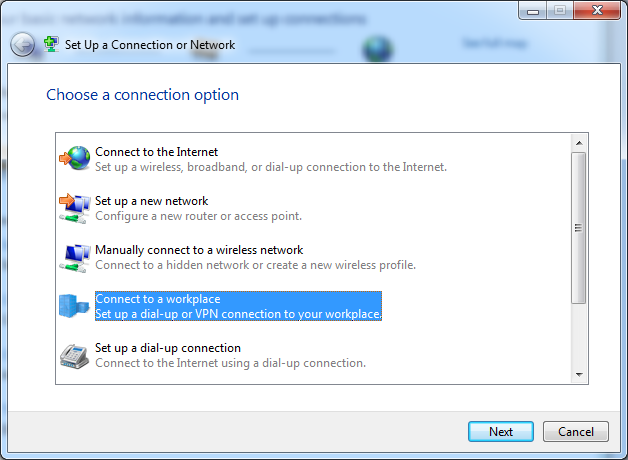
- Click “Set up a new connection…”

- Select “Connect to a workplace”.
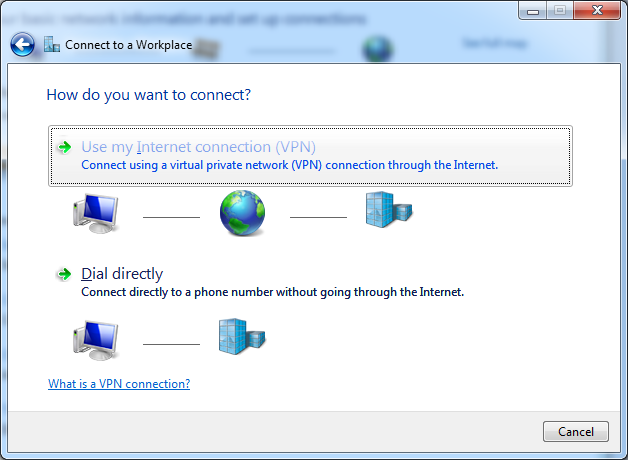
- Select “Use my Internet connection (VPN)”.
- Enter VPN server domain name or IP address. Name the VPN connection. Check “Don’t connect now; just set it up so I can connect later”.

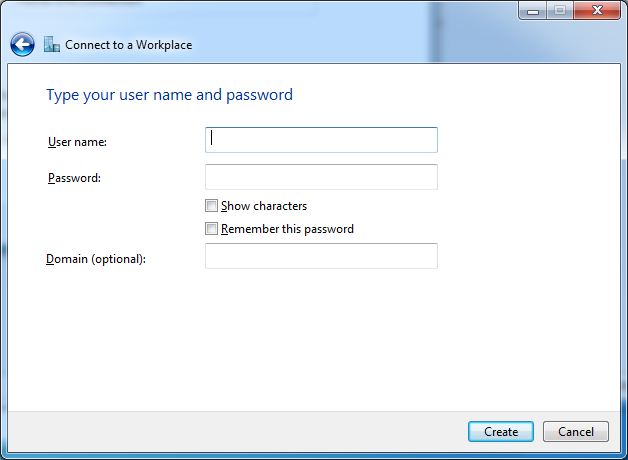
- Leave username, password empty (if you are authenticating with client certificates). Enter your username and password here if you are authenticating with EAP-MSCHAP v2. Click “Create”.
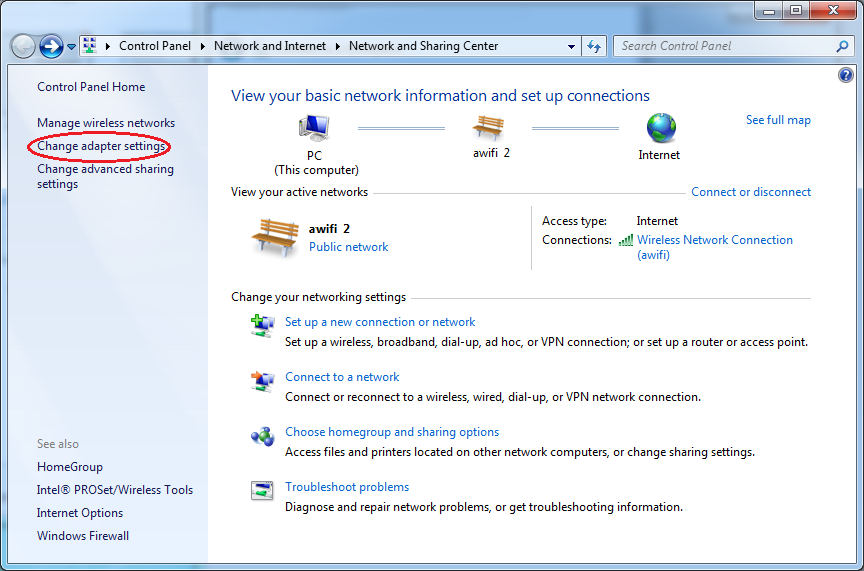
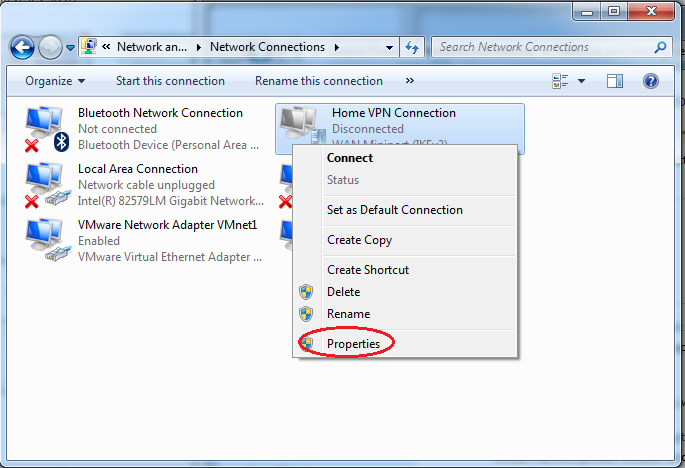
- After the VPN connection is created, go back to the “Network and Sharing Center”. Click on “Change adapter settings”.
- Right click on the newly created VPN connection. Click “Properties”.
- Click on the “Security” tab. Select “IKEv2” for “Type of VPN”. Click “Use machine certificates” (if you are using client certificates to authenticate the user). If you are using EAP-MSCHAP v2 (with username and password), see alternative task below.
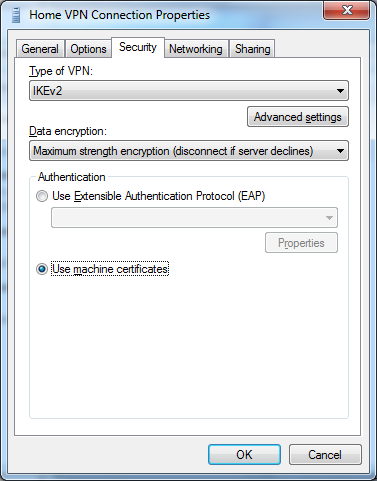
- Click on the “Networking” tab. Uncheck “TCP/IPv6). Click OK.

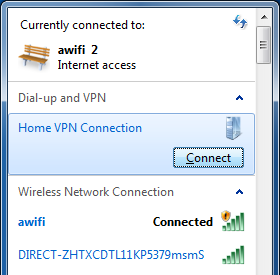
- Click on the network icon at the bottom right corner again. Click on the VPN connection, then click “Connect”.
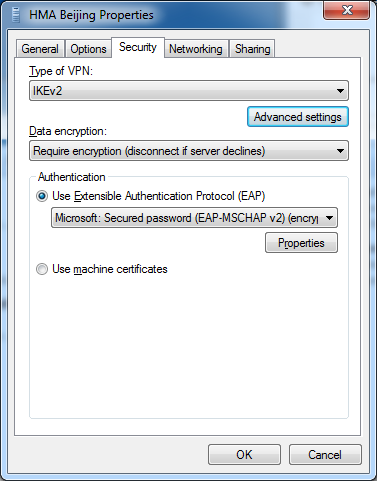
Alternative task 2: if authenticating with EAP-MSCHAP v2.
- In step 6 above, enter your username and password.
- In step 9 above, select “Use Extensible Authentication Protocol (EAP), then EAP-MSCHAP v2.
Task 3: Check that your VPN connection is working
- Open a web browser, enter https://ipleak.net/. Make sure that your IP address is that of the VPN service (i.e., no longer your ISP assigned IP address), and DNS addresses are also that from the VPN service.
- If your VPN server is located in the same geographical region as your ISP connection, sometimes it’s hard to tell if your DNS service has changed to that provided by the VPN. This page will tell you who is your DNS provider: http://whoismydns.com/
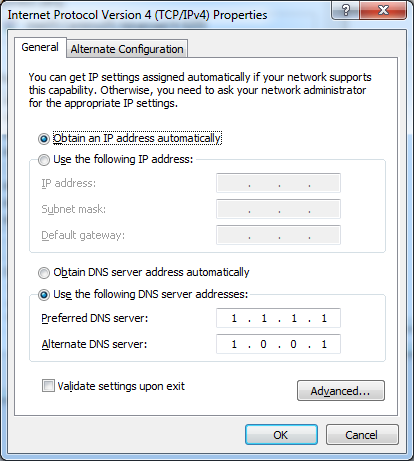
- There are instances that your browser is stuck with the ISP assigned DNS server. In that case, manually set the DNS service on your ISP connection (WiFi or Ethernet adapter) to a third party DNS service, for example, Cloudflare DNS. Just to be safe, disable IPv6 on the WiFi or Ethernet adapter too.
- Start mmc: click the Start button, then enter mmc.


Recent Posts
- Observing Android VPN Leaks with the pcWRT Router
- How to set up a second pcWRT router as an Access Point with VLAN support
- Is the MELLO charger a scam (Kickstarter)?
- How to reset the pcWRT router
- How to create your SSH key and use it on the router
Recent Comments
- on How to reset router password by email
- on How to reset router password by email
- on Does your parental control pass the DOH test?
- on How to create your SSH key and use it on the router
- on How to create your SSH key and use it on the router
Archives
- January 2025
- December 2024
- June 2024
- April 2024
- March 2024
- August 2023
- May 2023
- February 2023
- June 2022
- December 2021
- November 2021
- August 2021
- January 2021
- December 2020
- October 2020
- August 2020
- July 2020
- June 2020
- May 2020
- April 2020
- February 2020
- January 2020
- December 2019
- October 2019
- December 2018
- August 2018
- July 2018
- June 2018
- January 2018
- November 2017
- October 2017
- September 2017
- August 2017
- July 2017
- June 2017
- January 2017
- August 2016
- May 2016
- December 2015
- August 2015
- July 2015
- May 2015
- April 2015
- March 2015
Categories


