-
How to set up an IKEv2/IPsec VPN client connection on the pcWRT router
There are three steps to create an IKEv2/IPsec VPN client connection on the pcWRT router:
- Determine which of your local network(s) tunnel through the VPN.
- Create an Auth Config with the credentials for VPN provider
- Create a connection where you specify the hostname for the VPN server
Select the local network(s) to tunnel through the VPN
The pcWRT router allows you to create up to 5 local networks (including up to 4 WiFi networks). You can specify which of these networks tunnel through the IKEv2 VPN connection. This gives you the flexibility to switch between VPN and non-VPN connection quickly. For example, you can create two WiFi networks and tunnel one of them through the VPN connection. You can switch VPN on and off simply by connecting to a different SSID.
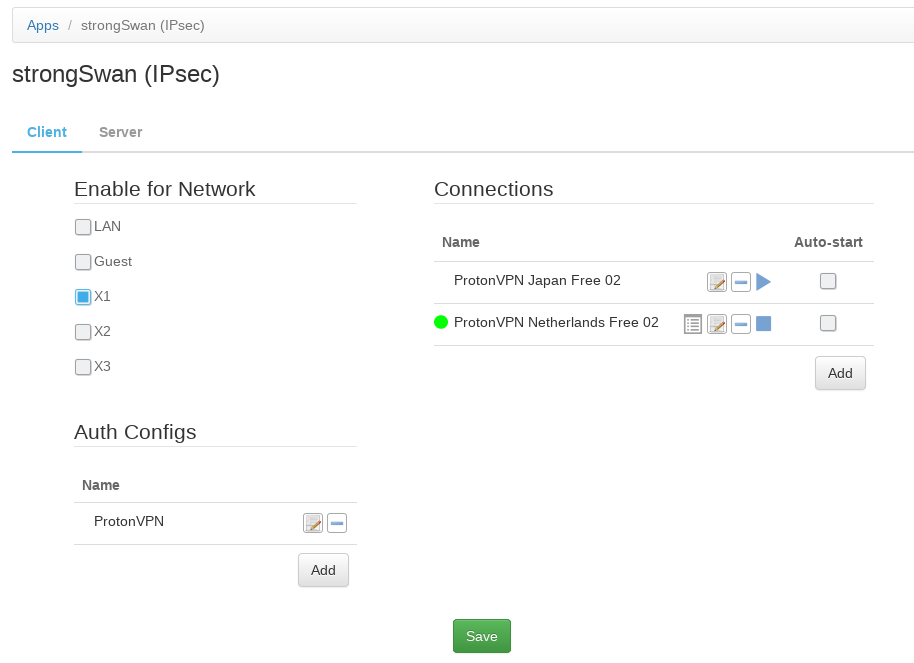
- Login the pcWRT console. Click Apps, then click strongSwan (IPsec).
- Check the network(s) you want to tunnel through the IKEv2 VPN under the Enable for Network section.

Create an Auth Config with your credentials
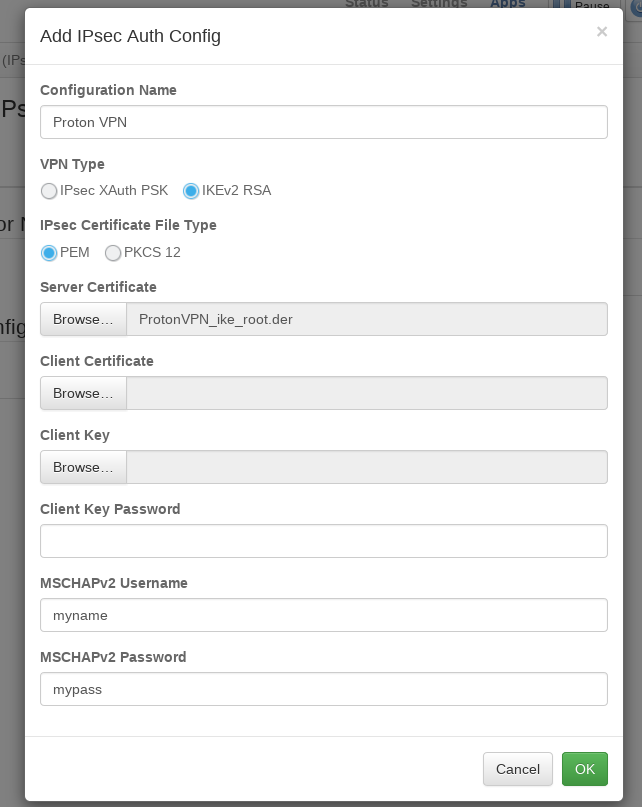
- Click on the Add button in under the Auth Config section.
- Enter a name for the Auth Config.
- Leave VPN Type as IKEv2 RSA.
- Leave IPsec Certificate Type as PEM.
- Click Browse to upload the certificate file for the IPsec server (most of the time it’s actually the server’s CA certificate).
- Enter your username & password in the MSCHAPv2 Username and MSCHAPv2 Password fields.
- Client Certificate, Client Key & Client Key Password are usually not used.
- Click OK to save the Auth Config.

Create an IKEv2 VPN connection
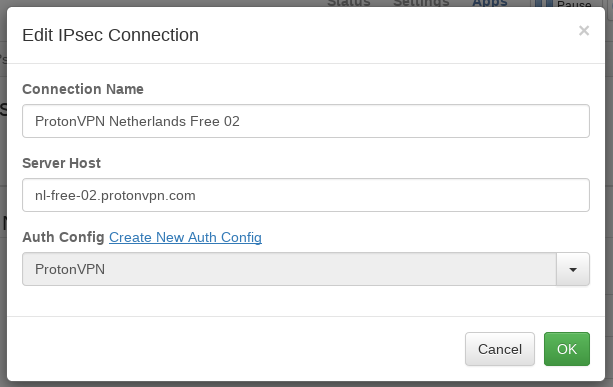
- Click the Add button under the Connections section.
- Enter a name for the connection
- Enter the server host name for the connection (you can get the list of available host names from your VPN provider).
- Select the Auth Config to use for the connection.
- Click OK to dismiss the dialog. Click the Save button to save your changes.

Start an IKEv2 VPN connection
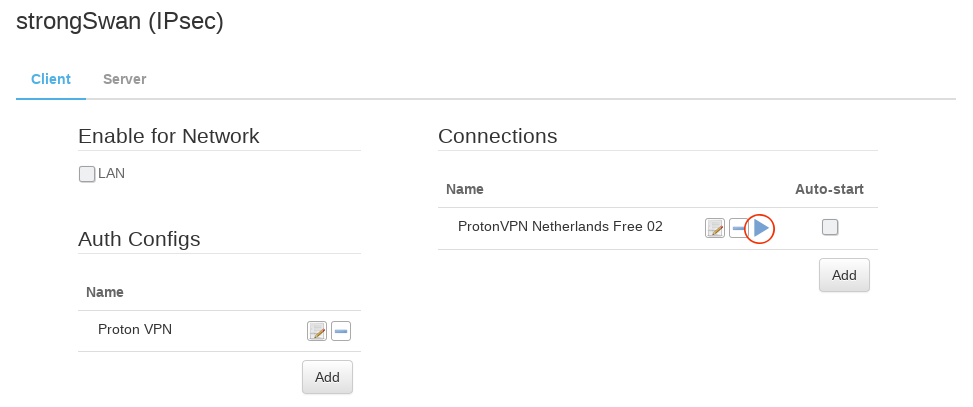
Click the Play button next to the connection name.


